

In the previous part, we have done to set up SEO on HTML meta tag using React Helmet.
Here to online your site, we have to deploy on server. because we are on the learning step, we can use free hosting to deploy static sites using Netlify.
- Build Blog Site using Gatsby JS — Part 1 (Getting Started)
- Build Blog Site using Gatsby JS — Part 2 (Chakra UI & Home Page)
- Build Blog Site using Gatsby JS — Part 3 (Gatsby Plugin Mdx)
- Build Blog Site using Gatsby JS — Part 4 (React Helmet and SEO tag)
- Build Blog Site using Gatsby JS — Part 5 (Deploy site to Netlify)
Introduce Netlify

Netlify is one of the most amazing web development platforms which is meant to multiply your productivity in the best possible way. The platform helps developers to build, test, and deploy websites. By unifying the modern decoupled web elements from local development processes to advanced logic, Netlify is offering an amazingly faster way to ensure much more performant, scalable, and secure websites and applications.
The website industry is changing away on a continuous as well as a rapid basis from monolithic to decoupled approaches. While developers are storming ahead with much more power than ever before. However, Netlify has been developed to cater to this moment. It is offering incredible web automation technology as well as web-hosting infrastructure. Netlify is offering next-generation solutions in both aspects and most amazingly, at a very affordable range.
It will work by connecting your GitHub repository to pull your website’s source code. After that, it will run a build process to pre-render your website’s pages into static HTML. The resulting pages will then be distributed and deployed across a wider range of content delivery networks. However, whenever, a user will request to access your website, it will choose the nearest data center automatically to serve users effectively
Create Repository on Github
I assumed you if have created your repository on GitHub and pushed gatsby blog code to that repository, if you have not yet, you can do it first
if you didn’t understand you can search on google.
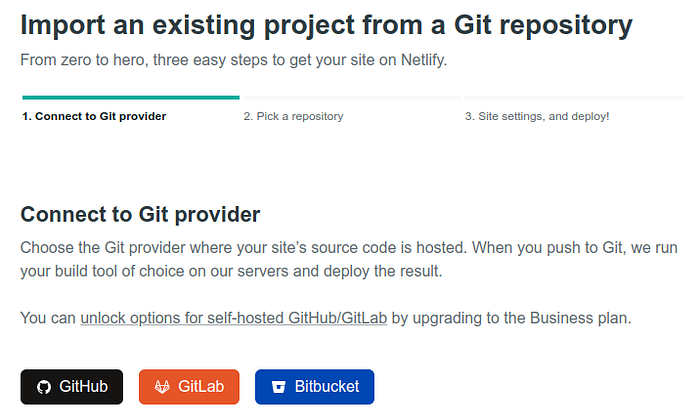
Deploy to Netlify
- Login your Netlify account and create a new site by import existing project
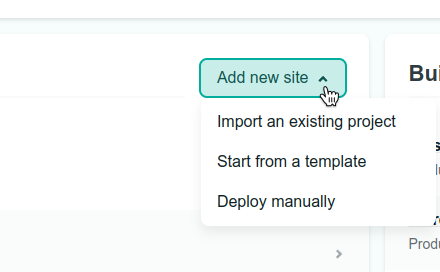
- You can select Github or other if you have a repository on it
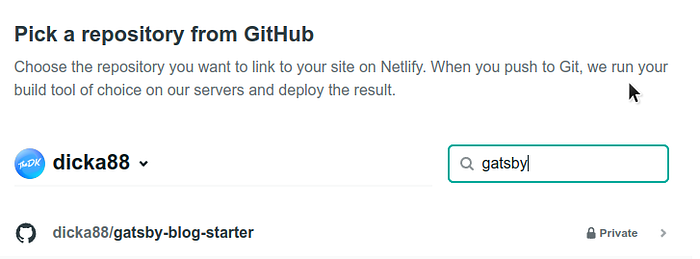
- Search and pick your repository
- And then click deploy site
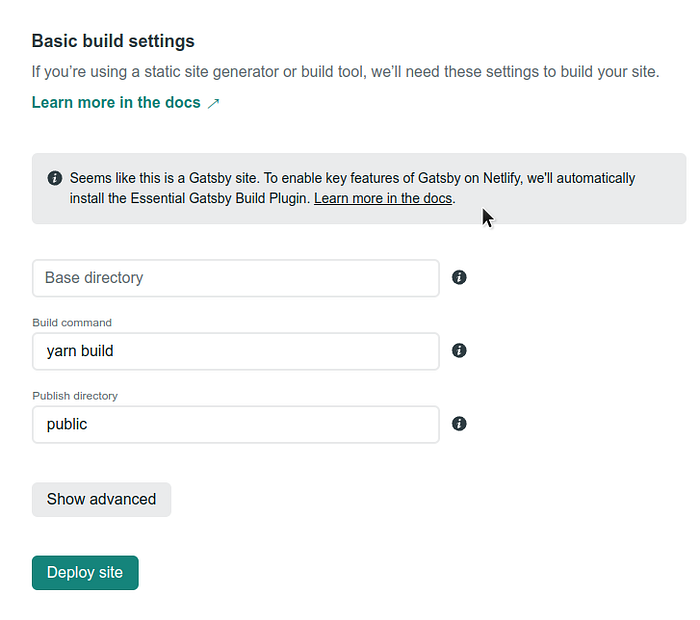 Basically Netlify will automatically identify type of your project, so we not needed to config anything.
 - Wait until build process done and your site has been deployed 👌, open the site by click the link.

Customize domain name
After process build, we can look that URL of site is a random word generated by netlify, we can change the domain using self domain or sub domain that provided by Netlify.
- Click on Domain settings
- Click on Options > Edit site name

- Give your custom site name

Okay, your site now is live on new domain
Conclusion
By using Netlify we can deploy static site for free, there are a limit of created page for free plan, but we chooose plan or we can delete a unused site that you created before.